Introduktion
This manual provides detailed instructions for the assembly, operation, maintenance, and troubleshooting of your Marada Reinforced Racing Simulator Cockpit, model simulator cockpit37. Please read this manual thoroughly before use to ensure proper setup and safe operation.
Säkerhetsinformation
- Ensure all bolts and fasteners are securely tightened before and after each use.
- Överskrid inte den maximala lastkapaciteten på 450 kg.
- Håll händer och fingrar borta från rörliga delar under justeringen.
- Placera sittbrunnen på en stabil, jämn yta för att förhindra att den välter.
- This product is designed for use with racing simulation peripherals. Do not modify the structure or use it for unintended purposes.
- Håll små delar borta från barn för att förhindra kvävningsrisk.
Paketets innehåll
Kontrollera att alla komponenter finns innan monteringen påbörjas:
- Main Cockpit Frame (pre-welded sections)
- Rattplattform
- Pedalplattform
- Shift Lever Platform
- Seat Mounting Brackets
- Justerbara fotkuddar
- Monteringsdetaljer (bultar, brickor, muttrar)
- Monteringsverktyg (skiftnycklar, insexnycklar)
- Cable Ties for cable management
Note: Steering wheel, shift lever, pedals, and racing seat are not included with this product.
Installation och montering
Follow these steps to assemble your racing simulator cockpit. Refer to the provided diagrams and videos for visual guidance.
Monteringsvideoguide
Video: Detailed assembly guide for the Marada Racing Wheel Simulator Stand Cockpit.
Steg-för-steg montering
- Montera basramen: Connect the main frame sections using the provided bolts and tools. Ensure all connections are secure.
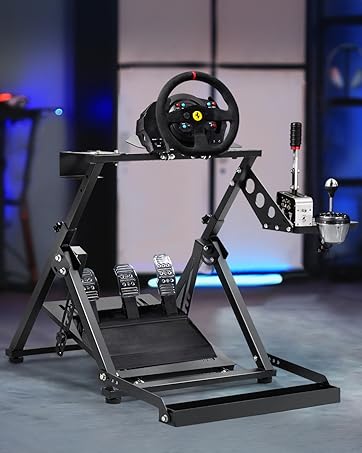
Figure 1: Assembly of the seat bracket, demonstrating vertical and horizontal adjustment points.
- Attach Seat Mounting Brackets: Secure the seat mounting brackets to the base frame. These brackets are adjustable for various seat types.
Figure 2: Seat bracket installation details, showing compatibility with seats having front/rear 28cm and left/right 23-44cm mounting dimensions.
- Install Steering Wheel Platform: Mount the steering wheel platform to the main uprights. Do not fully tighten until adjustments are made.
- Install Pedal Platform: Attach the pedal platform to the front section of the base. This platform is also adjustable.
- Attach Shift Lever Platform: Secure the shift lever platform to either the left or right side of the cockpit, according to your preference.
- Montera fotkuddar: Screw the adjustable foot pads into the bottom of the frame to ensure stability and protect your floor.
- Slutlig åtdragning: Once all components are in place and adjusted to your initial preference, securely tighten all bolts and fasteners.
Drift och justeringar
The Marada Racing Simulator Cockpit offers multiple adjustment points to customize your driving experience for optimal comfort and performance.

Figur 3: Överview of the cockpit's multiple adjustment capabilities.
- Rattplattform: The steering wheel platform can be adjusted for height and angle (0° to 5° range). Loosen the adjustment knobs, position the platform, and re-tighten securely.
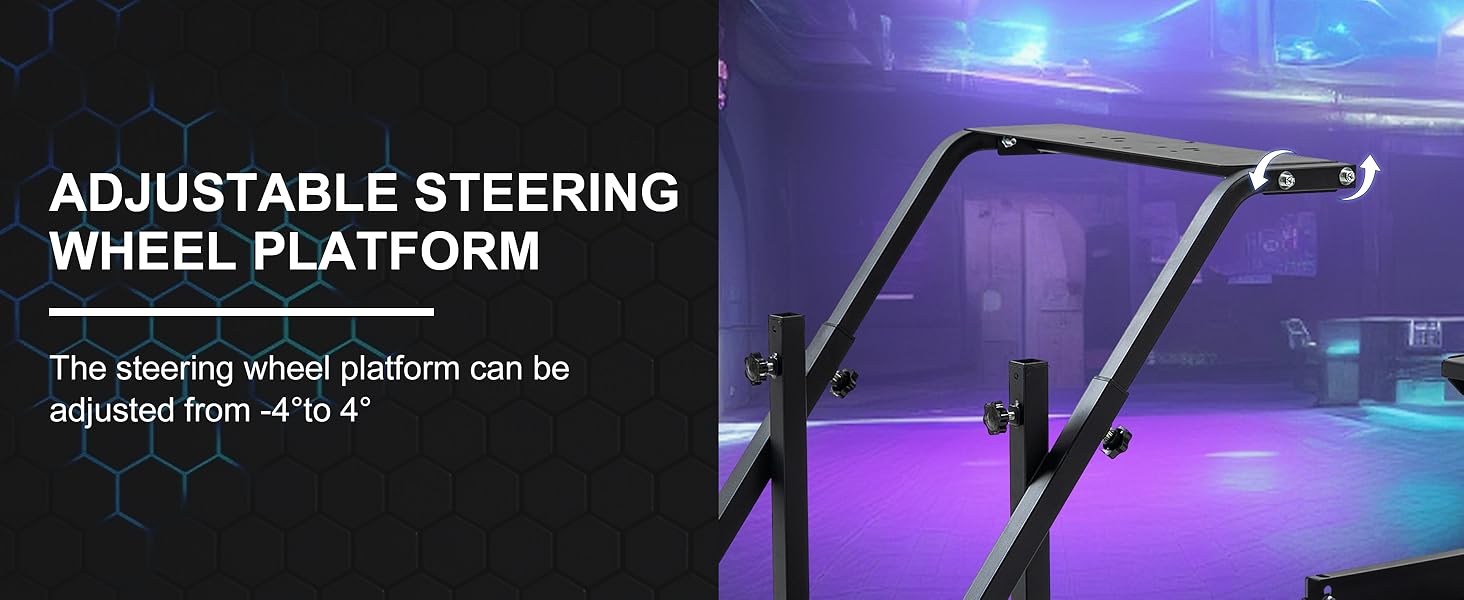
Figure 4: Steering wheel platform adjustment, showing angle flexibility.
- Pedalplattform: The pedal platform's angle can be adjusted from 0° to 30° to suit your preferred driving position. Loosen the side bolts, set the desired angle, and re-tighten.

Figure 5: Pedal platform adjustment, showing angle flexibility for comfort.
- Växelspaksplattform: The shift lever platform is height-adjustable and can be mounted on either the left or right side of the cockpit. Adjust the height and position for ergonomic access.

Figure 6: Shift lever platform adjustment, highlighting height and side mounting flexibility.
Kompatibilitet
This racing simulator cockpit is designed for wide compatibility with popular racing peripherals, including:
- Logitech G29, G920, G923
- Thrustmaster T128, T248, T300RS
- Moza R5
- PXN V9, V12
- Fanatec devices

Figure 7: Visual representation of the cockpit's broad compatibility with leading racing simulation brands.
Underhåll
Regular maintenance ensures the longevity and safe operation of your simulator cockpit.
- Rengöring: Torka av ramen med annonsamp trasa för att avlägsna damm och skräp. Undvik slipande rengöringsmedel.
- Kontroll av fästelement: Periodically inspect all bolts, nuts, and adjustment knobs to ensure they are tight. Re-tighten as necessary to maintain stability.
- Strukturell integritet: Check the alloy steel frame for any signs of damage, bends, or cracks. Discontinue use if significant damage is found and contact customer support.
- Kabelhantering: Use the provided cable ties to keep cables organized and prevent them from interfering with moving parts or becoming a tripping hazard.
Felsökning
If you encounter issues with your simulator cockpit, refer to the following common solutions:
- Cockpit feels unstable or wobbly:
- Se till att alla monteringsbultar är helt åtdragna.
- Verify the cockpit is placed on a flat, level surface.
- Adjust the foot pads to eliminate any rocking.
- Peripherals (wheel, pedals, shifter) do not fit:
- Check the mounting holes on your peripherals against the cockpit's pre-drilled holes. Some devices may require specific adapters (not included).
- Ensure you are using the correct bolts and washers for your specific peripheral.
- Svårigheter att justera plattformar:
- Loosen adjustment knobs sufficiently before attempting to move platforms.
- Ensure no cables or other obstructions are preventing movement.
If the issue persists, please contact Marada customer support for further assistance.
Specifikationer
| Särdrag | Detalj |
|---|---|
| Modellnummer | simulator cockpit37 |
| Material | Legerat stål |
| Produktmått (L x B x H) | 50.39 x 27.95 x 27.56 tum (ca 128 x 71 x 70 cm) |
| Objektets vikt | 39.2 pund (ca 17.8 kg) |
| Maximal lastkapacitet | 450 lbs (ca 204 kg) |
| Steering Wheel Platform Adjustment | Height and Angle (0° to 5° range) |
| Pedal Platform Adjustment | Angle (0° to 30° range) |
| Shift Lever Platform | Height adjustable, left/right mountable |
| Seat Compatibility | Adjustable to fit most racing seats (front/rear 28cm, left/right 23-44cm) |
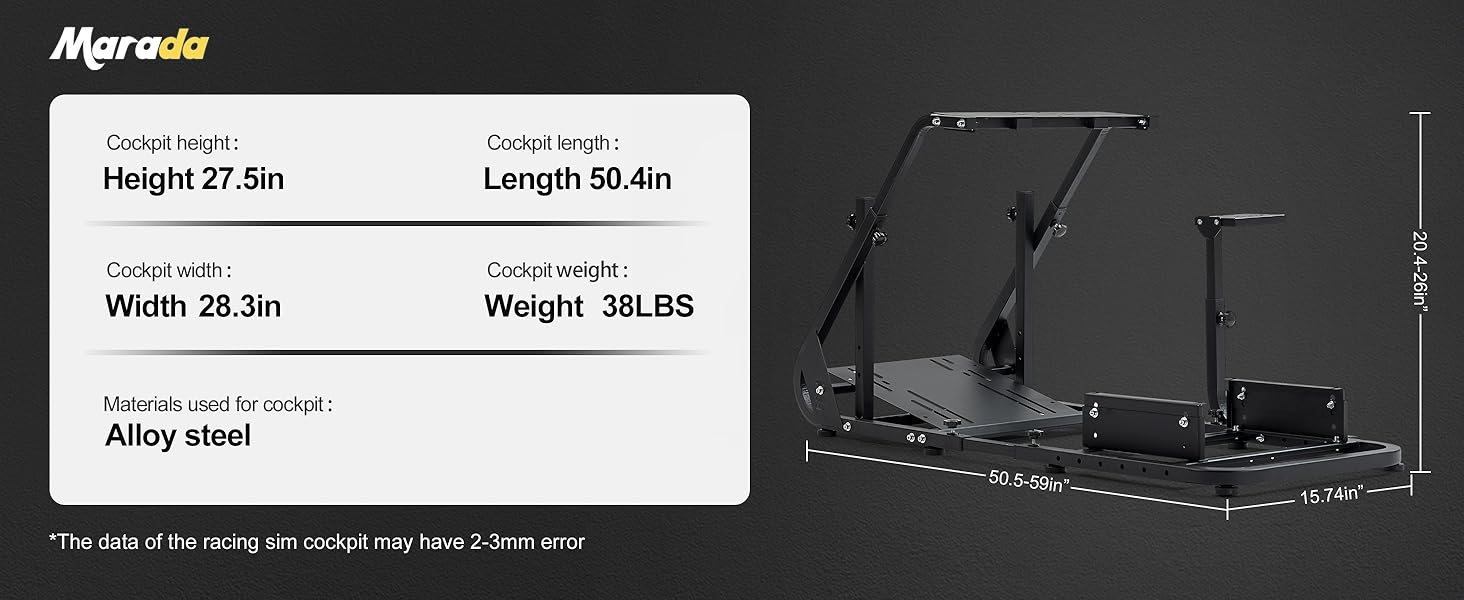
Figure 8: Detailed dimensions and weight of the Marada Racing Simulator Cockpit.
Ytterligare information
Produkt överview Video
Video: Överview of the Marada Racing Simulator Cockpit features and design.
Garanti och support
Marada stands behind the quality of its products. For warranty information, returns, or customer support, please refer to your purchase documentation or contact the seller directly.
- Returnerar: This product typically includes a 30-day free return policy. Please check your specific purchase details for eligibility.
- Kundsupport: For any questions, technical assistance, or parts replacement, please contact Marada customer service.
You can often find contact information on the seller's page or through the platform where the product was purchased.