1. Introduktion
Thank you for choosing the Marada M75 Racing Wheel Monitor Stand. This stand is designed to provide a stable and immersive display solution for your racing simulator cockpit. It is compatible with various racing setups and supports monitors up to 60 inches. This manual provides essential information for proper assembly, operation, and maintenance to ensure a safe and enjoyable experience.
2. Säkerhetsinformation
- Read all instructions carefully before attempting assembly or use.
- Förvara allt förpackningsmaterial utom räckhåll för barn för att förhindra kvävningsrisk.
- Ensure all fasteners, bolts, and connections are securely tightened before placing a monitor on the stand and before each use.
- Överskrid inte den maximala viktkapaciteten för 65 lbs (29.5 kg) for the monitor.
- Use this monitor stand only with compatible racing simulator cockpits as specified by Marada.
- Place the stand on a flat, stable, and level surface to prevent tipping.
- Avoid placing the stand in high-traffic areas where it could be accidentally bumped.
3. Paketets innehåll
Kontrollera att alla komponenter finns innan monteringen påbörjas. Paketet innehåller:
- Main monitor stand frame (vertical support bars, horizontal monitor mounting bars)
- Monitor mounting brackets (VESA compatible)
- Base feet for stability
- Adjustable bolts, nuts, and washers for assembly and securing the monitor
- Rubber feet for enhanced grip

Image: The Marada M75 Monitor Stand shown as a standalone unit, illustrating the main components included. This product includes only the monitor stand; racing seats, game stands, joysticks, pedals, shifters, and displays are sold separately.
4. Installation och montering
Follow these steps to assemble your Marada M75 Racing Wheel Monitor Stand:
- Packa upp komponenter: Carefully remove all parts from the packaging. Refer to the package contents list to ensure all items are present.
- Fäst basfötterna: Securely attach the base feet to the bottom of the vertical support bars using the provided bolts and nuts. Ensure they are oriented correctly for maximum stability.
- Connect Vertical and Horizontal Bars: Assemble the vertical support bars and connect them to the horizontal monitor mounting bars. The design allows for adjustment of height and width.
- Adjust VESA Brackets: Adjust the position of the monitor mounting brackets (VESA plates) on the horizontal bars to match your monitor's VESA hole pattern. The stand supports various VESA patterns (e.g., 100x100mm to 500x400mm).

Image: Diagram illustrating VESA compatibility ranges (W x H) and how the monitor mounting brackets can be adjusted horizontally and vertically to fit different monitor sizes and VESA patterns.
- Montera monitorn: Carefully attach your monitor to the VESA mounting brackets using the appropriate screws provided with your monitor or the stand. Ensure the monitor is centered and securely fastened.
- Position Stativ: Place the assembled monitor stand in front of your racing simulator cockpit.
- Secure to Cockpit: Use the adjustable bolts to fix the monitor stand to your racing cockpit. This step is crucial for improving overall stability and preventing movement during intense gaming sessions.
- Slutkontroll: Double-check all connections, bolts, and nuts to ensure they are tight and secure. Confirm the stand is stable and the monitor is firmly mounted before use.

Image: The Marada M75 Monitor Stand shown integrated with a racing simulator cockpit, demonstrating its intended use and how it complements a full setup.
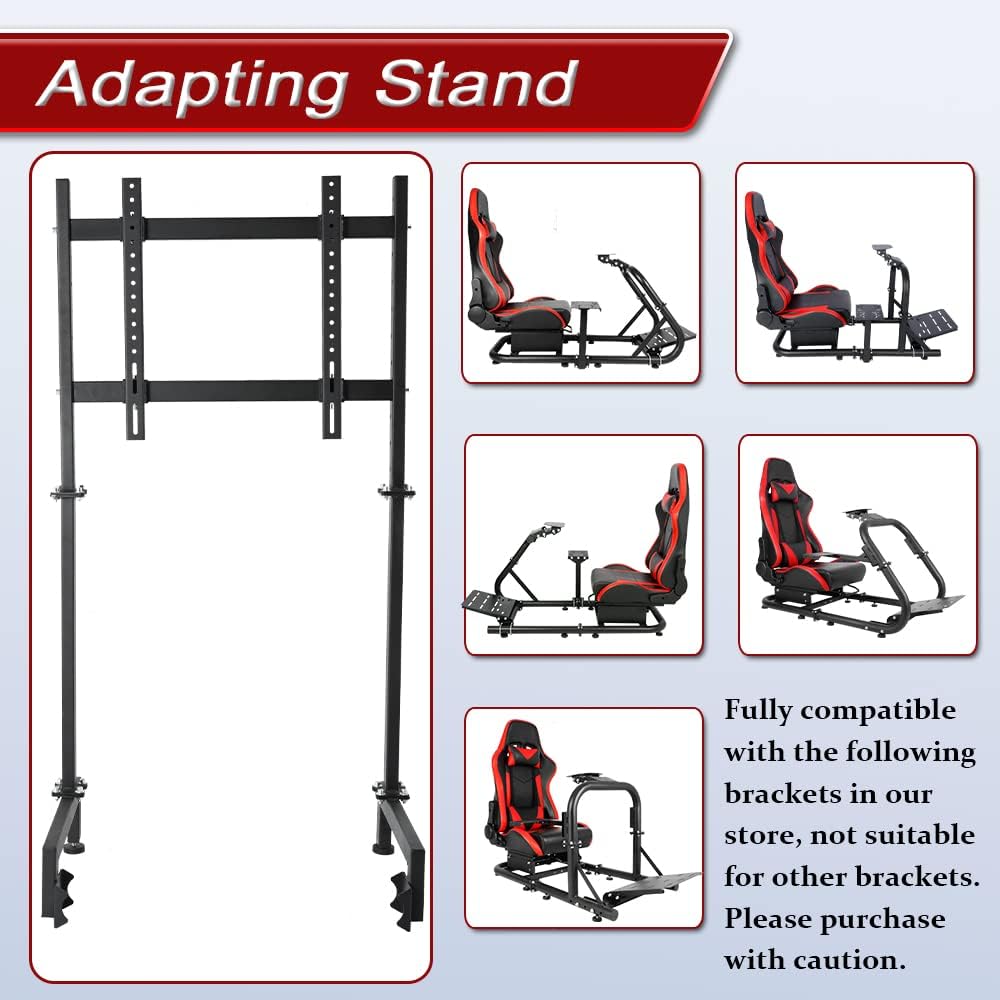
Image: The Marada M75 Monitor Stand displayed alongside various Marada racing simulator cockpits, highlighting its compatibility with other Marada brand products. This stand is designed for Marada round tube racing steering wheel brackets.
5. Bruksanvisning
Once the Marada M75 Monitor Stand is fully assembled and securely attached to your racing cockpit, it provides a fixed and stable platform for your display. No specific operational steps are required beyond ensuring the monitor is properly mounted and powered on. The stand's primary function is to hold your monitor in an optimal viewing position for an immersive racing experience.
6. Underhåll
- Regelbundna kontroller: Periodically inspect all bolts, nuts, and connections to ensure they remain tight. Vibrations from gaming can sometimes loosen fasteners.
- Rengöring: Clean the stand with a soft, dry cloth. For stubborn dirt, a slightly damp cloth can be used, followed by drying. Avoid using abrasive cleaners, solvents, or harsh chemicals, as these can damage the finish.
- Skadeinspektion: Regularly check the stand for any signs of wear, bending, cracks, or other damage. If any damage is found, discontinue use immediately and contact customer support for assistance.
7. Felsökning
| Utfärda | Möjlig orsak/lösning |
|---|---|
| Stativet är instabilt eller vinglar. |
|
| Monitor does not fit the mounting brackets. |
|
| Saknade delar vid uppackning. |
|
8. Specifikationer
| Särdrag | Detalj |
|---|---|
| Stämpla | Marada |
| Modellnummer | M75 |
| Objektets vikt | 23.2 pund (10.5 kg) |
| Produktens mått | 23.7 x 10 x 5.99 tum (60.2 x 25.4 x 15.2 cm) |
| Material | Metall (legerat stål) |
| Färg | Svart |
| Monteringstyp | Golvmontering |
| Rörelsetyp | Fast |
| Specialfunktioner | Adjustable height and width |
| Kompatibla enheter | Skärm, TV |
| Max Monitor Size Supported | Upp till 60 tum |
| Max viktkapacitet | 65 lbs (29.5 kg) |
| VESA-kompatibilitet | 100x100mm, 200x100mm, 200x200mm, 300x200mm, 300x300mm, 400x200mm, 400x300mm, 400x400mm, 500x200mm, 500x300mm, 500x400mm |

Image: Detailed diagram showing the product dimensions, including overall height (46"), horizontal bar width (19.6"), and tube diameters (vertical 0.9", horizontal 1.5").
9. Garanti och support
For warranty information, technical assistance, or to inquire about replacement parts, please contact Marada customer service directly through their official website or the retailer from whom you purchased this product. Please retain your purchase receipt as proof of purchase for any warranty claims.