1. Introduktion
Welcome to the user manual for your Emerson CKSS7071 Sunrise Smartset Alarm Clock Radio. This device is designed to enhance your daily routine with its unique features, including a sunrise simulation, soothing sound options, Bluetooth connectivity, and an 8-color dimmable LED display. Please read this manual thoroughly to understand the full functionality and ensure proper use and care of your new alarm clock radio.
1 video: Överview of the Emerson CKSS7071 Sunrise Smartset Alarm Clock Radio. This video demonstrates the key features and design of the product.
2. Viktig säkerhetsinformation
- Läs alla instruktioner innan du använder apparaten.
- Spara dessa instruktioner för framtida referens.
- Använd inte denna apparat nära vatten.
- Rengör endast med en torr trasa.
- Blockera inte några ventilationsöppningar. Installera enligt tillverkarens anvisningar.
- Installera inte nära några värmekällor som radiatorer, värmeregister, spisar eller andra apparater (inklusive amplyftare) som producerar värme.
- Skydda nätsladden från att trampas på eller klämmas, särskilt vid kontakter, bekvämlighetsuttag och den punkt där den kommer ut från apparaten.
- Använd endast tillbehör/tillbehör som specificerats av tillverkaren.
- Koppla ur denna apparat under åskväder eller när den inte används under långa perioder.
- Överlåt all service till kvalificerad servicepersonal. Service krävs när apparaten har skadats på något sätt, till exempel nätsladden eller kontakten är skadad, vätska har spillts eller föremål har fallit in i apparaten, apparaten har utsatts för regn eller fukt, inte fungerar normalt , eller har tappats.
3. Paketets innehåll
Kontrollera att alla artiklar finns med när du öppnar paketet:
- Emerson CKSS7071 Sunrise Smartset Alarm Clock Radio
- Nätadapter
- Användarmanual
4. Produkt överview
4.1 Fram View

Bild 1: Främre view of the alarm clock, featuring the digital time display and the sunrise simulation light panel.
The front of the unit features the main 1.2-inch LED time display and the large circular light panel for sunrise simulation and ambient lighting. Indicators for AM/PM, Alarm 1/2, and Bluetooth status are also visible.
4.2 sida View (Kontroller)
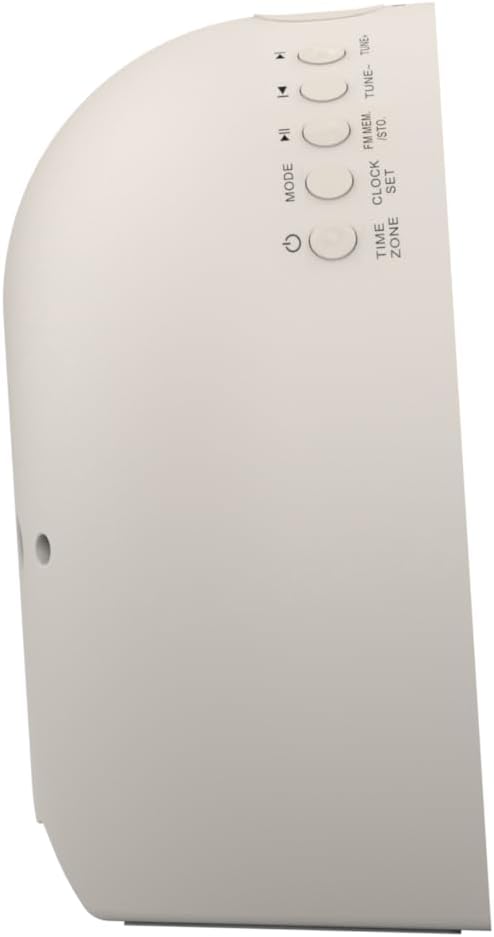
Bild 2: Sida view på väckarklockan, vilket markerar kontrollknapparna för olika funktioner.
The side panel houses the primary control buttons, including Power, Mode, Clock Set, Time Zone, Tune/Skip, and Volume controls. These buttons are used for setting time, alarms, and navigating audio functions.
4.3 Bak View

Bild 3: Bak view of the alarm clock, showing the speaker grille and power connection port.
The rear of the unit features the main speaker grille and the power input port for connecting the AC adapter.
5. Inställning
5.1 Strömanslutning
- Plug the AC power adapter into the DC IN jack located on the back of the unit.
- Plug the other end of the adapter into a standard wall outlet (AC 100-240V, 50/60Hz).
- Enheten slås på automatiskt.
5.2 SmartSet Automatic Time Setting
The SmartSet system automatically sets the correct time and date as soon as you plug in the unit. It also maintains time and alarm settings during power disruptions or outages, provided the button cell battery is installed.
5.3 Installation av batteribackup
A button cell battery (CR2032, included) is required for battery backup. This ensures that time and alarm settings are retained during a power outage.
- Leta reda på batterifacket på enhetens undersida.
- Öppna batterifackets lock.
- Sätt i ett CR2032-knappcellsbatteri och se till att polerna är rättvända (+/-).
- Stäng batterifacket ordentligt.
6. Bruksanvisning
6.1 Setting the Clock Manually
- Tryck och håll ned KLOCKA INSTÄLLD knapp. Timsiffrorna blinkar.
- Använd TUNE -/+ knapparna för att justera timmen. Tryck på KLOCKA INSTÄLLD för att bekräfta.
- Minutsiffrorna kommer att blinka. Använd TUNE -/+ knapparna för att justera minuterna. Tryck på KLOCKA INSTÄLLD för att bekräfta.
- Fortsätt med denna process för att ställa in år, månad och dag.
- Trycka KLOCKA INSTÄLLD igen för att avsluta tidsinställningsläget.
6.2 Ställa in larm (Larm 1 och Larm 2)
The unit features dual alarms. Follow these steps for each alarm:
- Tryck och håll ned LARM 1 or LARM 2 knappen. Siffrorna för larmets timmar blinkar.
- Använd TUNE -/+ buttons to adjust the alarm hour. Press the respective LARM för att bekräfta.
- Siffrorna för larmets minuter kommer att blinka. Använd TUNE -/+ buttons to adjust the alarm minutes. Press the respective LARM för att bekräfta.
- Select the alarm source (Buzzer, FM Radio, or Soothing Sound). Press the respective LARM för att bekräfta.
- Justera larmvolymen med hjälp av VOL -/+ buttons. Press the respective LARM för att bekräfta.
- The alarm is now set. The alarm indicator (AL1 or AL2) will appear on the display.
6.3 Soluppgångssimulering
The sunrise simulation feature gradually brightens the light panel before your set alarm time, mimicking a natural sunrise to gently wake you.
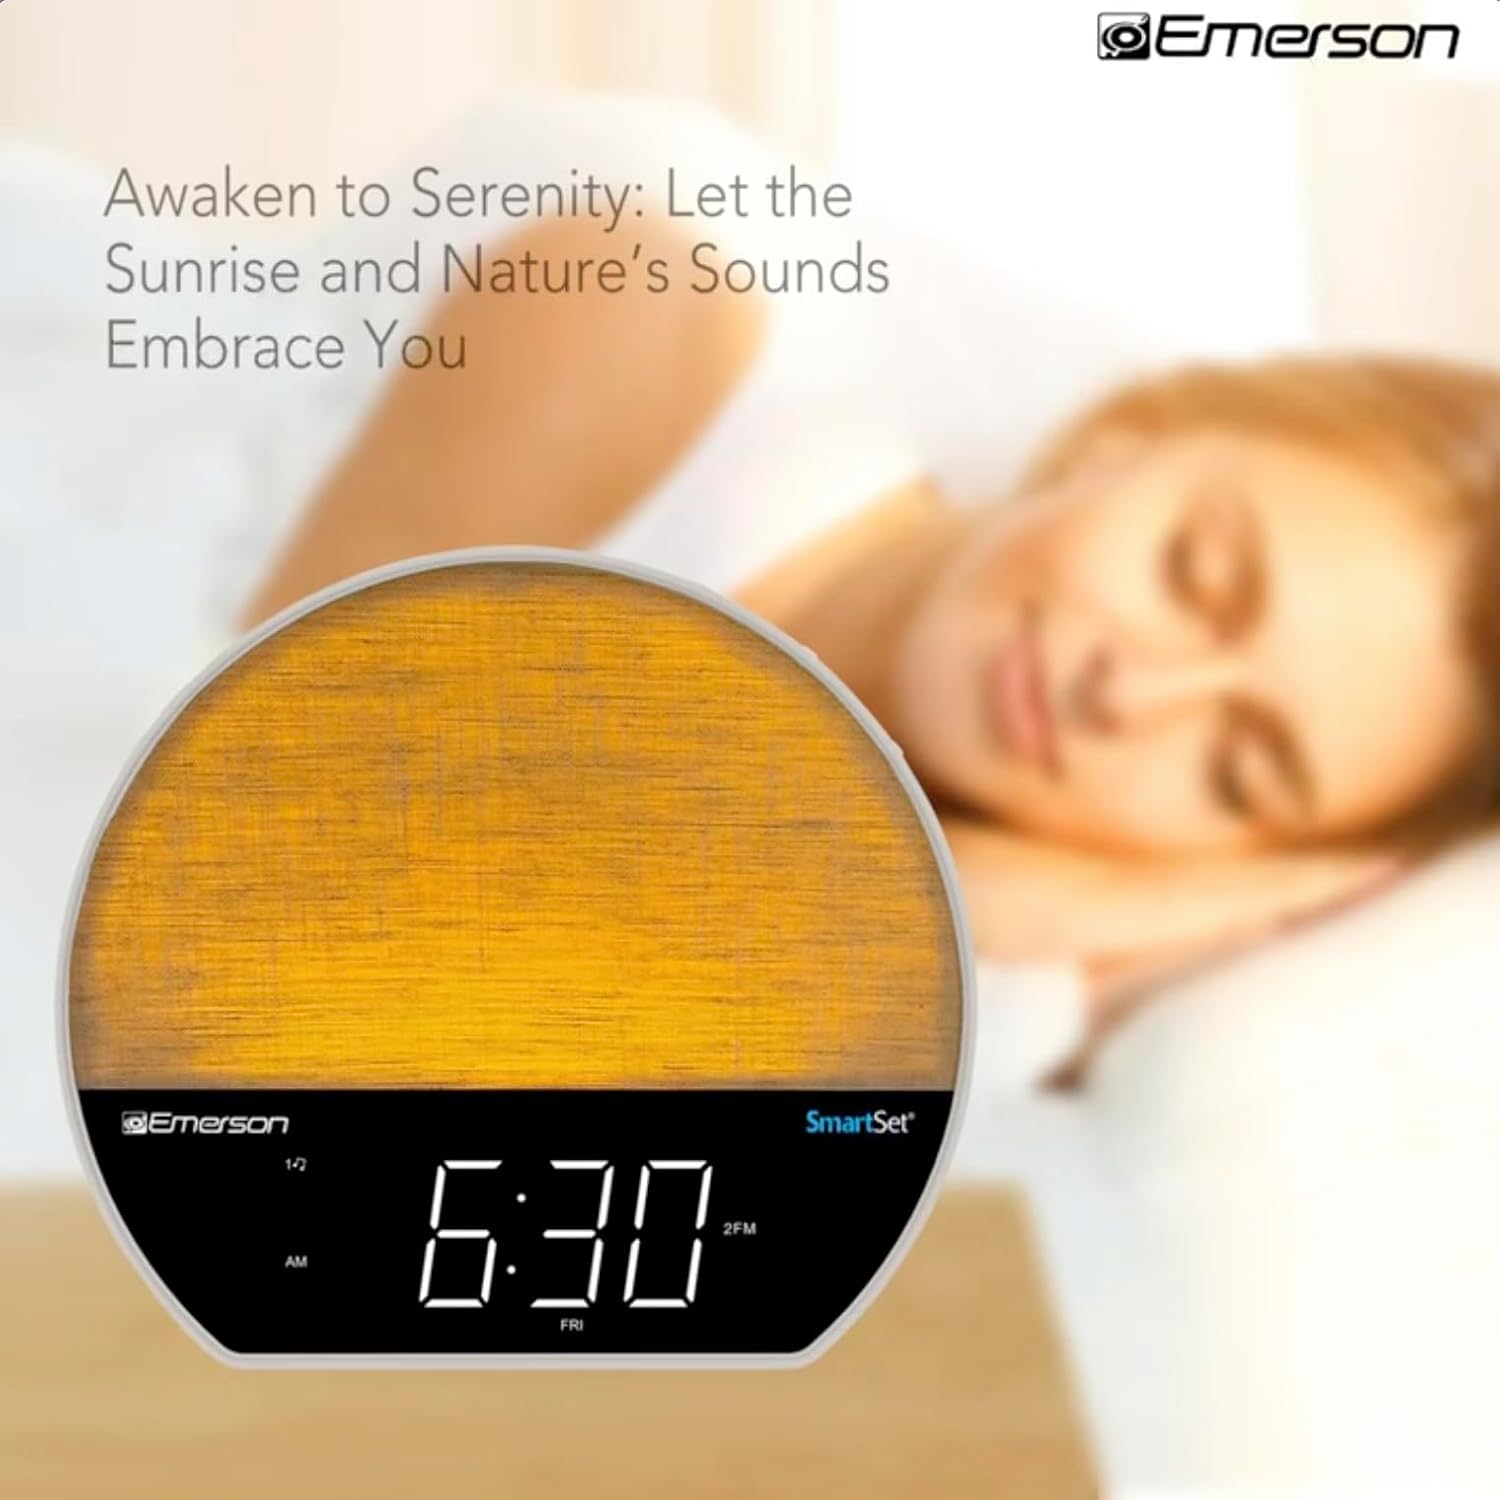
Bild 4: The alarm clock simulating a sunrise with a warm, increasing ljusintensitet.
To activate, ensure the sunrise option is selected during alarm setup. The light will begin to brighten 30 minutes before the alarm sounds.
6.4 Soothing Sounds and White Noise
The unit includes 6 soothing sounds and white noise to help with relaxation or waking up.
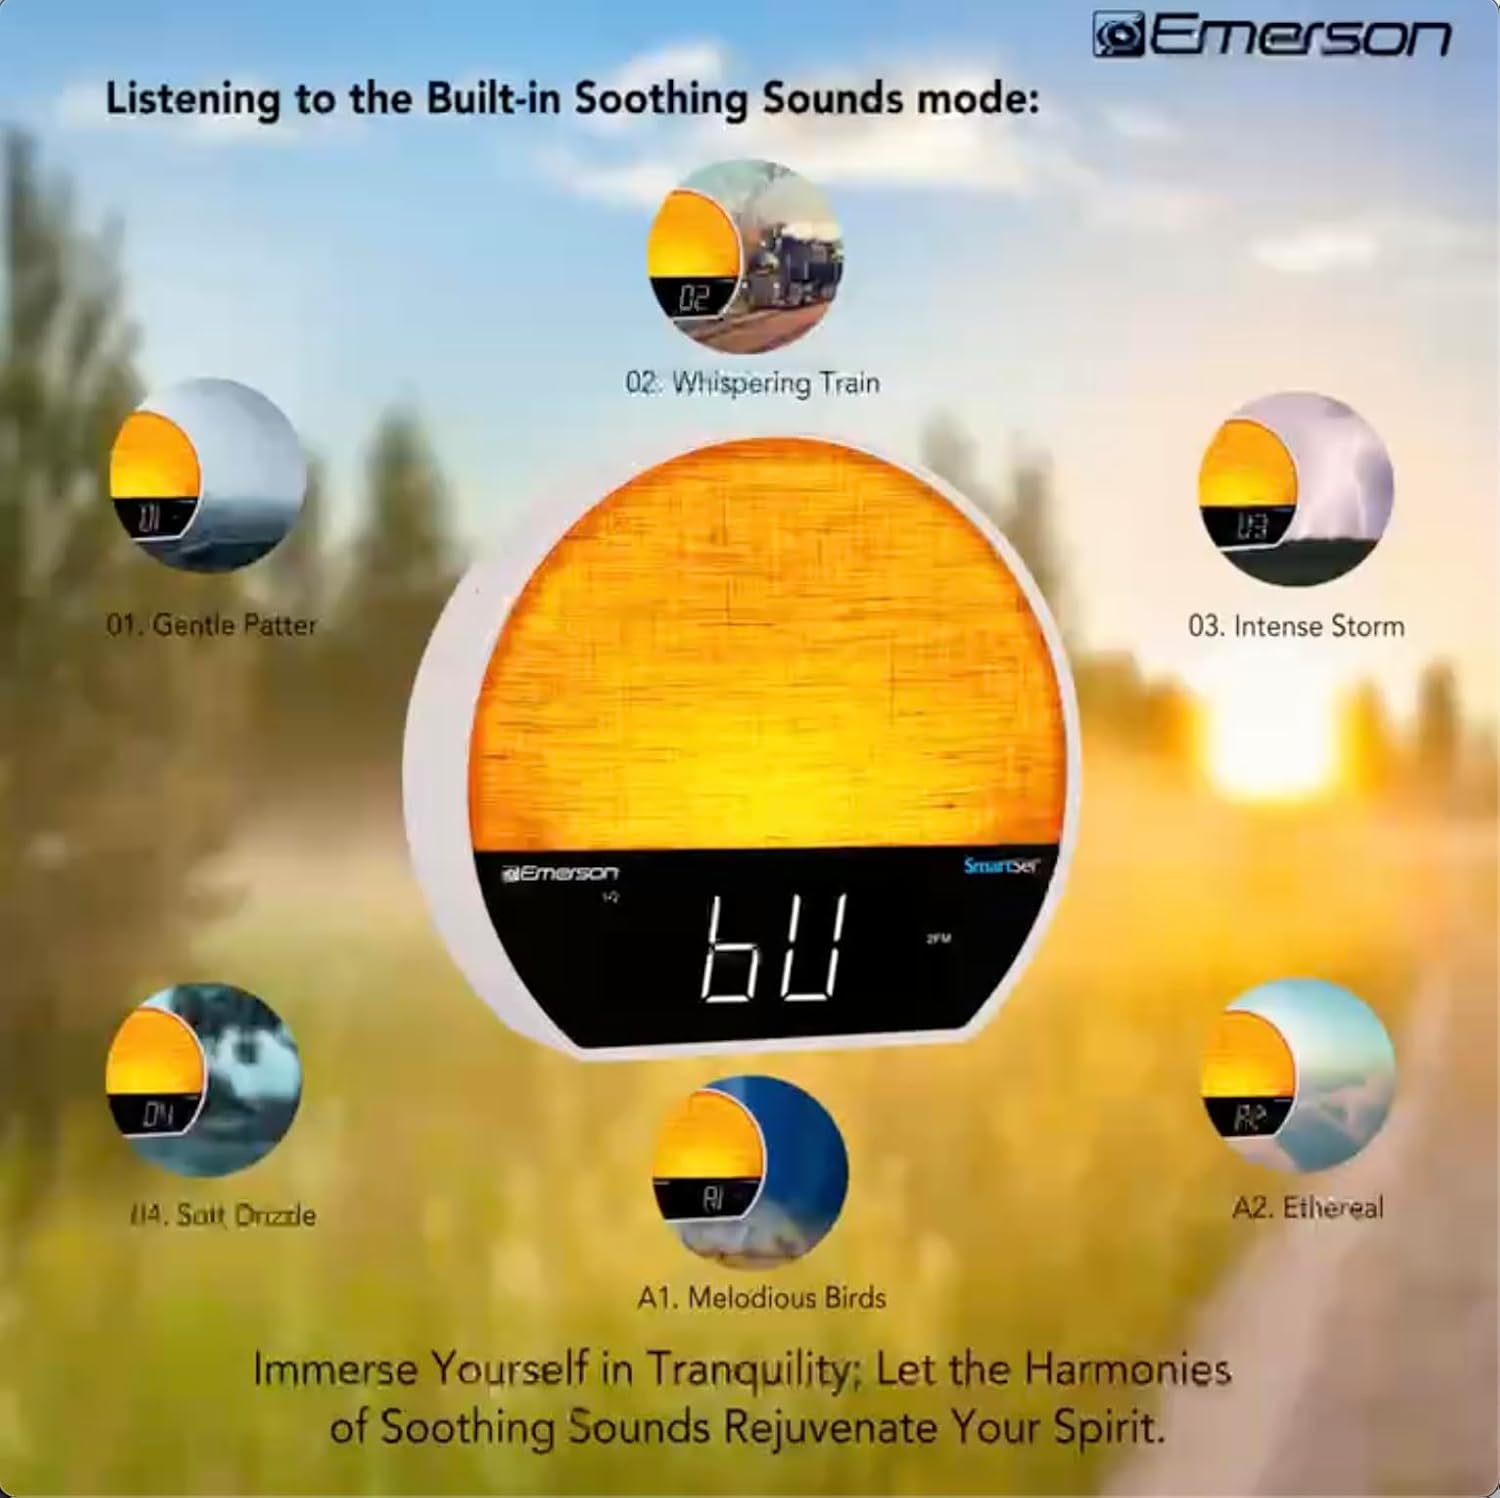
Bild 5: Visual representation of the six soothing sound modes available on the alarm clock.
- Tryck på LÄGE button repeatedly until the Soothing Sound mode is selected.
- Använd TUNE -/+ buttons to cycle through the available sounds (e.g., Gentle Patter, Whispering Train, Intense Storm, Soft Drizzle, Melodious Birds, Ethereal, White Noise).
- Justera volymen med VOL -/+ knappar.
6.5 Bluetooth-högtalarfunktion
Anslut din smartphone eller annan Bluetooth-aktiverad enhet för att strömma ljud trådlöst.

Bild 6: The alarm clock in Bluetooth mode, paired with a mobile device for audio streaming.
- Tryck på LÄGE button until 'BT' appears on the display, indicating Bluetooth mode.
- On your device, enable Bluetooth and search for 'Emerson CKSS7071'.
- Select the device to pair. A confirmation tone will sound upon successful pairing.
- Du kan nu spela upp ljud från din enhet via väckarklockans högtalare.
6.6 FM-radiofunktion
Lyssna på dina favorit FM-radiostationer.
- Tryck på LÄGE knappen tills 'FM' visas på displayen.
- Tryck på TUNE -/+ buttons briefly to manually tune to a station.
- Tryck och håll ned TUNE -/+ knapparna för att automatiskt söka efter nästa tillgängliga station.
- För att spara en station, tryck och håll ner FM MEM knappen tills det förinställda numret blinkar. Använd TUNE -/+ för att välja ett förinställt nummer, tryck sedan på FM MEM igen för att spara.
6.7 LED Decor and Dimmer Control
Customize the ambient light with 8 different colors and adjust the brightness.

Bild 7: The alarm clock demonstrating its 8-color dimmable LED decor options.
- Tryck på LJUS button to cycle through the 8 available colors or turn the light off.
- To adjust the brightness of the LED decor light, press and hold the LJUS button. The brightness will cycle through 5 levels. Release the button at your desired brightness.
6.8 Display Dimmer Control
Adjust the brightness of the 1.2-inch LED time display.

Bild 8: The alarm clock illustrating the five distinct levels of display luminescence.
Tryck på DIMMER button (often combined with another function, refer to button labels) to cycle through 4 levels of display brightness (Bright, Moderate, Dim, Faint).
6.9 Insomningstimer
Set a timer for the audio to automatically turn off after a specified duration.

Bild 9: The alarm clock set for a sunset sleep timer, providing a harmonious end to the day.
- While audio is playing (FM or Soothing Sound), press the SOVA knapp.
- Tryck upprepade gånger på SOVA button to cycle through available sleep timer durations (e.g., 15, 30, 60, 90 minutes, or OFF).
- The audio will automatically turn off after the selected time.
6.10 Snooze -funktion
När ett larm ljuder, tryck på SNOOZE button (usually a large button on top) to temporarily silence the alarm for a few minutes. The alarm will sound again after the snooze period.
7. Underhåll
7.1 Rengöring
- Koppla alltid ur enheten från eluttaget innan rengöring.
- Använd en mjuk, torr trasa för att rengöra de yttre ytorna.
- Använd inte flytande rengöringsmedel, slipande rengöringsmedel eller kemiska sprayer, eftersom dessa kan skada ytbehandlingen.
7.2 Batteribyte
Om tids- och alarminställningarna inte sparas under ett strömavbrotttage, the button cell backup battery may need to be replaced. Follow the instructions in section 5.3 to replace the CR2032 battery.
8. Felsökning
| Problem | Möjlig orsak | Lösning |
|---|---|---|
| Enheten slås inte på. | Strömadaptern är inte ansluten eller defekt. | Se till att nätadaptern är ordentligt ansluten till enheten och ett fungerande vägguttag. |
| Tids-/alarminställningar förlorade efter strömavbrotttage. | Reservbatteriet är dött eller inte installerat. | Install or replace the CR2032 button cell battery (see section 5.3). |
| Larmet ljuder inte. | Larmet är inte aktiverat eller så är volymen för låg. | Ensure the alarm is set and activated (AL1/AL2 indicator on). Increase alarm volume. |
| Bluetooth-enheten kan inte paras ihop. | Unit not in Bluetooth mode or device too far. | Ensure the unit is in Bluetooth mode ('BT' displayed). Move your device closer to the unit. Try unpairing and re-pairing. |
| Dålig FM-radiomottagning. | Antennen är inte utdragen eller störningar. | Extend the FM wire antenna fully and reposition it for better reception. Avoid placing near other electronic devices. |
| Skärmen är för ljus/svag. | Display dimmer setting needs adjustment. | Tryck på DIMMER button to cycle through brightness levels (see section 6.8). |
9. Specifikationer
| Särdrag | Detalj |
|---|---|
| Modellnummer | CKSS7071 |
| Strömkälla | AC 100-240V, 50/60Hz (via AC adapter) |
| Batteribackup | 1 x CR2032 Button Cell Battery (included) |
| Visningstyp | 1.2-tums LED-skärm |
| Bluetooth-version | V5.4 |
| Lugnande ljud | 6 Nature Sounds + White Noise |
| LED Decor Colors | 8 Dimmable Colors |
| Produktmått (B x D x H) | 7.09 x 3.15 x 6.37 cm |
| Vikt | Ej specificerat |
10. Garantiinformation
Emerson products are manufactured to the highest quality standards. This product is covered by a limited warranty against defects in materials and workmanship for a period of one (1) year from the original date of purchase. This warranty does not cover damage caused by misuse, accident, unauthorized modification, or normal wear and tear. Proof of purchase is required for all warranty claims. Please retain your receipt.
11. Kundsupport
If you have any questions, require assistance, or experience issues with your Emerson CKSS7071 Sunrise Smartset Alarm Clock Radio, please contact our customer support team.
- Webplats: Besök den officiella Emerson webwebbplats för vanliga frågor och supportresurser.
- E-post: Se produktförpackningen eller den officiella website for customer service email contact.
- Telefon: Se produktförpackningen eller den officiella webwebbplats för kundtjänstens telefonnummer.
Please have your model number (CKSS7071) and proof of purchase ready when contacting support.