1. Introduktion
Thank you for choosing the Morpilot HS010-G 6-in-1 Electric Milk Frother. This appliance is designed to create various milk preparations, including warm dense foam, warm airy foam, warm milk, hot milk, hot chocolate, and cold foam, enhancing your coffee and beverage experience at home. Please read this manual thoroughly before first use to ensure safe operation and optimal performance.
2. Säkerhetsinstruktioner
- Se alltid till att apparaten placeras på en stabil, plan och värmetålig yta.
- Do not immerse the base unit in water or any other liquid. The glass carafe is detachable and washable.
- Förvaras utom räckhåll för barn. Denna apparat är inte avsedd att användas av personer med nedsatt fysisk, sensorisk eller mental förmåga utan uppsikt.
- Använd inte apparaten om nätsladden eller kontakten är skadad.
- Avoid touching hot surfaces. Use the anti-scald handle when pouring.
- Only use the provided whisk attachments.
- Do not fill above the maximum fill lines indicated on the glass carafe to prevent overflow.
- Unplug the frother from the power outlet when not in use and before cleaning.
3. Produkt överview
Familiarize yourself with the components of your Morpilot Milk Frother.

Figure 1: Morpilot Milk Frother with examples of prepared beverages (warm and thin foam, warm and dense foam, warm milk, hot milk, hot chocolates, cold foam).
The appliance consists of a power base, a detachable glass carafe with a handle, and various whisk attachments for different functions. The control panel on the base features intuitive buttons for selecting your desired milk preparation.
4. Inställning
- Packa upp: Ta försiktigt ut alla komponenter ur förpackningen.
- Rena: Before first use, wash the glass carafe and whisk attachments with warm soapy water. Rinse thoroughly and dry. Wipe the power base with a damp trasa.
- Montera: Place the desired whisk attachment inside the glass carafe. Ensure it is securely seated on the central pin.
- Placera: Placera basenheten på en torr, stabil och värmetålig yta.
- Ansluta: Anslut nätsladden till ett lämpligt eluttag.
5. Bruksanvisning
The Morpilot Milk Frother offers 6 functions for various milk preparations. Always ensure the correct whisk is installed for frothing, and remove the whisk coil for heating only.

Figure 2: Fill lines for hot milk (MAX 500ml) and milk foam (MAX 250ml, MIN 130ml).
Allmänna driftssteg:
- Pour milk into the glass carafe. Observe the MIN (130ml) and MAX (250ml for frothing, 500ml for heating) fill lines. For best results, use full-fat milk (fat content > 3%).
- Place the glass carafe onto the power base.
- Select the desired function by pressing the corresponding button on the base. The indicator light will illuminate.
- The frother will automatically start and stop when the process is complete.
- Carefully remove the carafe using the handle and pour your prepared milk.
Specifika funktioner:
- Warm Dense Foam: Use the frothing whisk. Fills to MAX 250ml.
- Warm Airy Foam: Use the frothing whisk. Fills to MAX 250ml.
- Warm Milk (50-60°C): Remove the whisk coil. Fills to MAX 500ml.
- Hot Milk (65-70°C): Remove the whisk coil. Fills to MAX 500ml.
- Varm choklad: Use the frothing whisk. Add chocolate powder/flakes with milk. Fills to MAX 250ml.
- Kallskum: Use the frothing whisk. Fills to MAX 250ml.
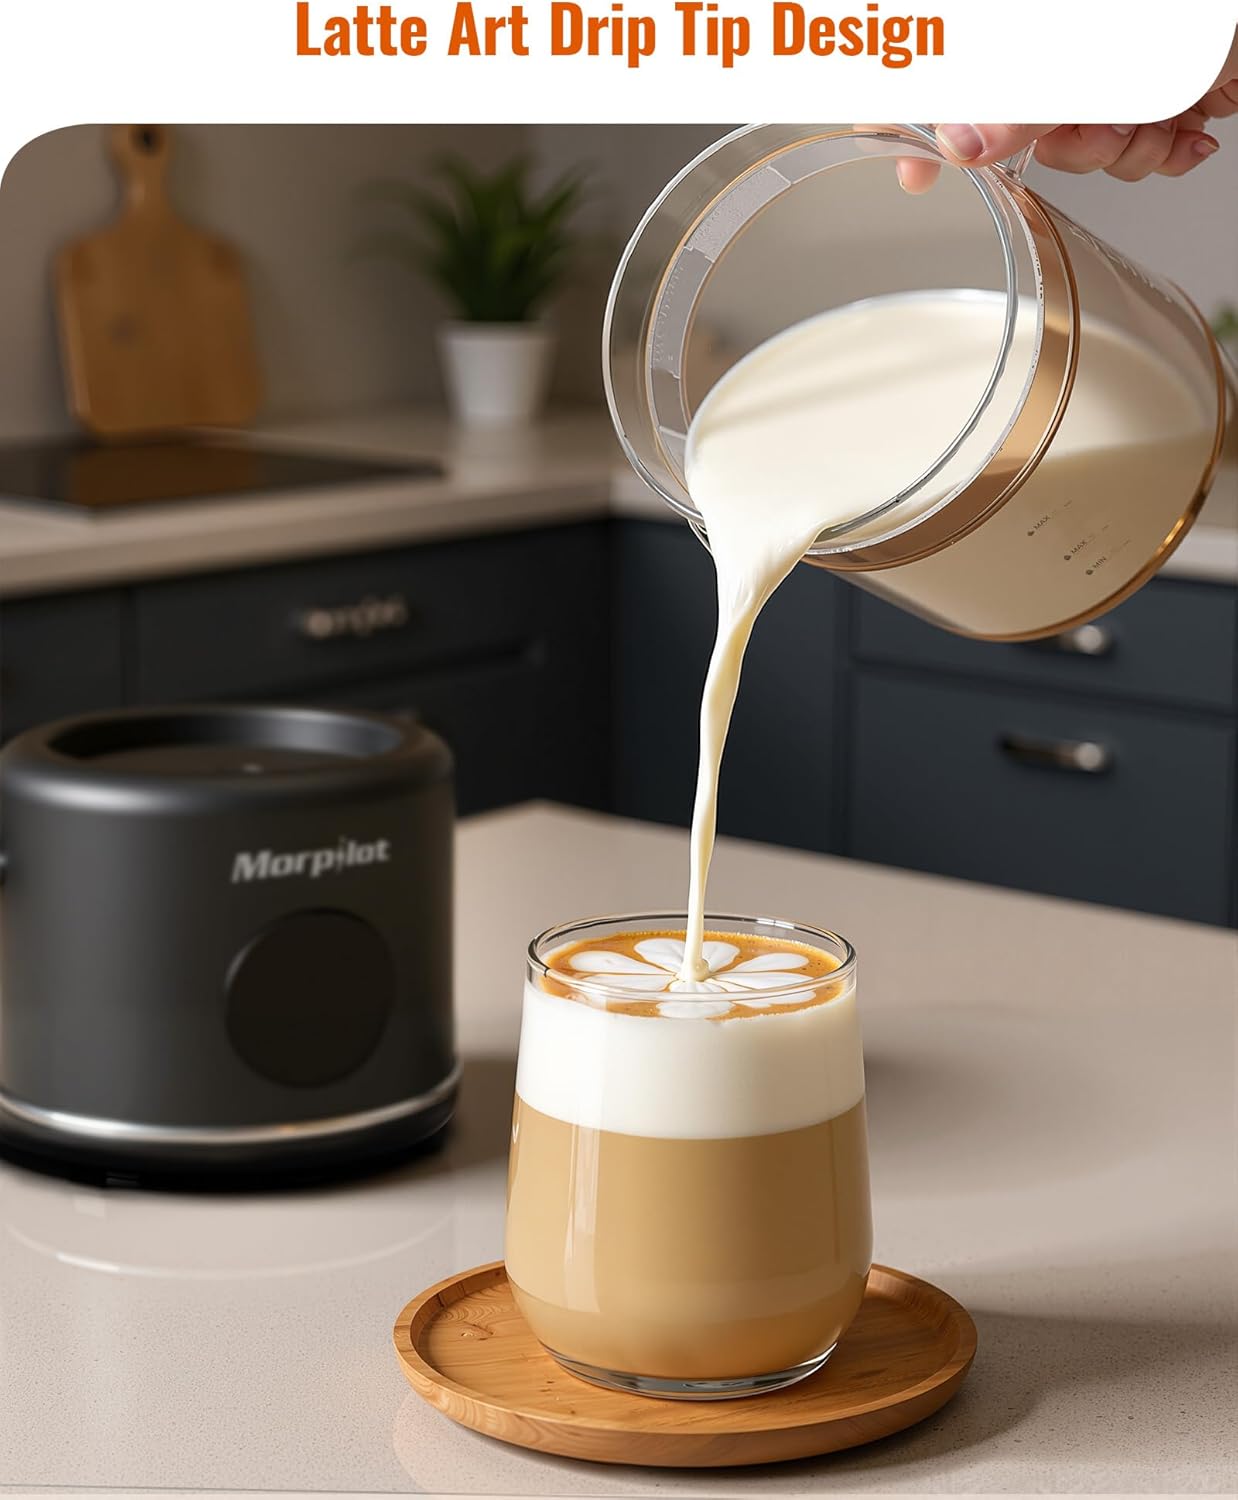
Figure 3: The drip-free spout design allows for precise pouring, ideal for latte art.
6. Underhåll och rengöring
Regelbunden rengöring säkerställer att din mjölkskummare håller länge och fungerar optimalt.
- Dra ur: Koppla alltid bort apparaten från eluttaget innan du rengör den.
- Svalna: Allow the frother to cool down completely after use.
- Wash Carafe and Whisks: The glass carafe and whisk attachments are dishwasher safe or can be hand-washed with warm soapy water. Rinse thoroughly.
- Ren bas: Torka av utsidan av strömbasen med en mjuk, damp trasa. Sänk inte ner basen i vatten.
- Torka: Ensure all parts are completely dry before reassembling or storing. Wipe away any water spots from the base of the milk cup after cleaning to maintain optimal performance.

Figure 4: The glass carafe and lid are suitable for both dishwasher and hand washing.
7. Felsökning
If you encounter any issues, please refer to the following troubleshooting guide:
| Problem | Möjlig orsak | Lösning |
|---|---|---|
| Skummaren slås inte på. | Inte inkopplad; strömmen är utdragentage; felaktigt uttag. | Se till att skummaren är ordentligt inkopplad. Kontrollera eluttaget med en annan apparat. |
| Mjölken skummar eller värms inte upp ordentligt. | Incorrect milk type; insufficient milk; whisk not installed correctly; whisk coil missing for heating. | Use full-fat milk (>3% fat). Ensure milk is between MIN and MAX fill lines. Check that the whisk is properly seated. For heating only, ensure the whisk coil is removed. |
| Mjölk flödar över. | Overfilled carafe. | Överskrid inte MAX-påfyllningslinjen för skumning (250 ml) eller uppvärmning (500 ml). |
| Burning smell or milk sticks to bottom. | Carafe not cleaned properly; dry operation. | Clean the carafe thoroughly after each use. Ensure there is always milk in the carafe when operating. The automatic shut-off feature should prevent burning. |
Om problemet kvarstår efter att du har följt dessa steg, vänligen kontakta kundsupporten.
8. Specifikationer
- Stämpla: Morpilot
- Modell: HS010-G
- Färg: Svart
- Kapacitet: 500 ml (heating), 250 ml (frothing max), 130 ml (frothing min)
- Material: Glas
- Specialfunktioner: Automatic Shut-off, Visual Glass Carafe
- Strömkälla: Elektrisk med sladd
- Artikelvikt: 1.1 kilo
- Mått: 21 x 15.2 x 14.6 cm
9. Garanti och support
Morpilot products are designed for reliability and performance. For warranty information or technical support, please refer to the warranty card included with your product or visit the official Morpilot website. Please have your model number (HS010-G) and purchase date ready when contacting support.