
1. Viktiga säkerhetsinstruktioner
Läs noggrant igenom alla instruktioner innan du använder apparaten. Spara denna manual för framtida bruk.
- Se till att strömförsörjningen matchar volymentage som anges på klassificeringsetiketten.
- Doppa inte apparaten, nätsladden eller kontakten i vatten eller andra vätskor.
- Unplug from the outlet when not in use, before cleaning, or during maintenance.
- Använd inte någon apparat med en skadad sladd eller kontakt, eller efter att apparaten inte fungerar eller har skadats på något sätt.
- Denna apparat är endast avsedd för hushållsbruk. Använd inte utomhus.
- Håll apparaten borta från värmekällor och direkt solljus.
- Ensure proper ventilation around the unit. Maintain at least 15cm clearance on all sides.
- Använd endast dricksvatten i vattentanken.
- Förvara inte explosiva ämnen som aerosolburkar med brandfarligt drivmedel i denna apparat.
2. Produkt överview
The EUHOMY IM004-CSI is an automatic ice maker designed for convenient ice production at home or for small business use. It features high-speed ice making, adjustable ice thickness, and an automatic cleaning function.

Image: The EUHOMY IM004-CSI ice maker filled with clear ice cubes, highlighting its capacity and rapid ice production capabilities.
Paketets innehåll:
- EUHOMY IM004-CSI Ice Maker
- Iskorg
- Isskeda
- Användarmanual
3. Inställning
3.1 Uppackning och placering
- Ta bort allt förpackningsmaterial och kontrollera om det finns några skador.
- Placera ismaskinen på en stabil, jämn yta, borta från direkt solljus och värmekällor.
- Ensure there is at least 15cm of space around the unit for proper ventilation.
- Låt enheten stå upprätt i minst 2 timmar innan du ansluter den, särskilt om den har transporterats horisontellt. Detta gör att köldmediet kan sätta sig.
3.2 Inledande rengöring
Before first use, clean the ice maker thoroughly.
- Öppna locket och ta ut iskorgen.
- Clean the interior with a soft cloth and warm water with a mild detergent. Rinse thoroughly.
- Drain any remaining water by removing the drain plug at the bottom.
- Torka av utsidan med annonsamp trasa.
3.3 Water Filling Methods
The ice maker offers two convenient ways to add water to its 3.2L tank:

Image: Illustration showing two ways to fill the water tank: directly pouring water into the tank or using an inverted water bottle (up to 5cm diameter opening).
- Method 1: Direct Fill
Open the lid and directly pour potable water into the water tank until it reaches the MAX fill line. - Method 2: Water Bottle Connection
Place an inverted water bottle (with a mouth diameter of 5cm or less) onto the designated water inlet. The ice maker will automatically draw water as needed.
4. Bruksanvisning
4.1 Kontrollpanelen överview

Bild: En detaljerad view of the ice maker's control panel, showing buttons for power, timer/clean, ice full indicator, water shortage indicator, and ice size adjustment.
- PÅ/AV-knapp: Slår på eller av enheten.
- TIMER/RENGÖRING-knapp: Press once to set the timer. Press and hold for 5 seconds to activate the automatic cleaning function.
- Indikator för full is: Lyser när iskorgen är full.
- Vatten Shortage-indikator: Lights up when the water tank is low.
- +/- knappar: Adjust ice thickness or timer settings.
4.2 Istillverkningsprocessen
- Ensure the water tank is filled with potable water.
- Anslut ismaskinen till ett jordat eluttag.
- Tryck på PÅ/AV button to start the ice making cycle.
- The unit will produce 24 clear ice cubes per cycle, taking approximately 12-18 minutes depending on ambient temperature and selected ice thickness.
- When the ice basket is full, the ice full indicator will light up, and the unit will pause ice production. Remove ice to resume.
- Om vattennivån är låg, blir vattennivån korttage indicator will light up. Add more water to continue ice production.
4.3 Justering av istjocklek
You can adjust the thickness of the ice cubes to suit your preference.
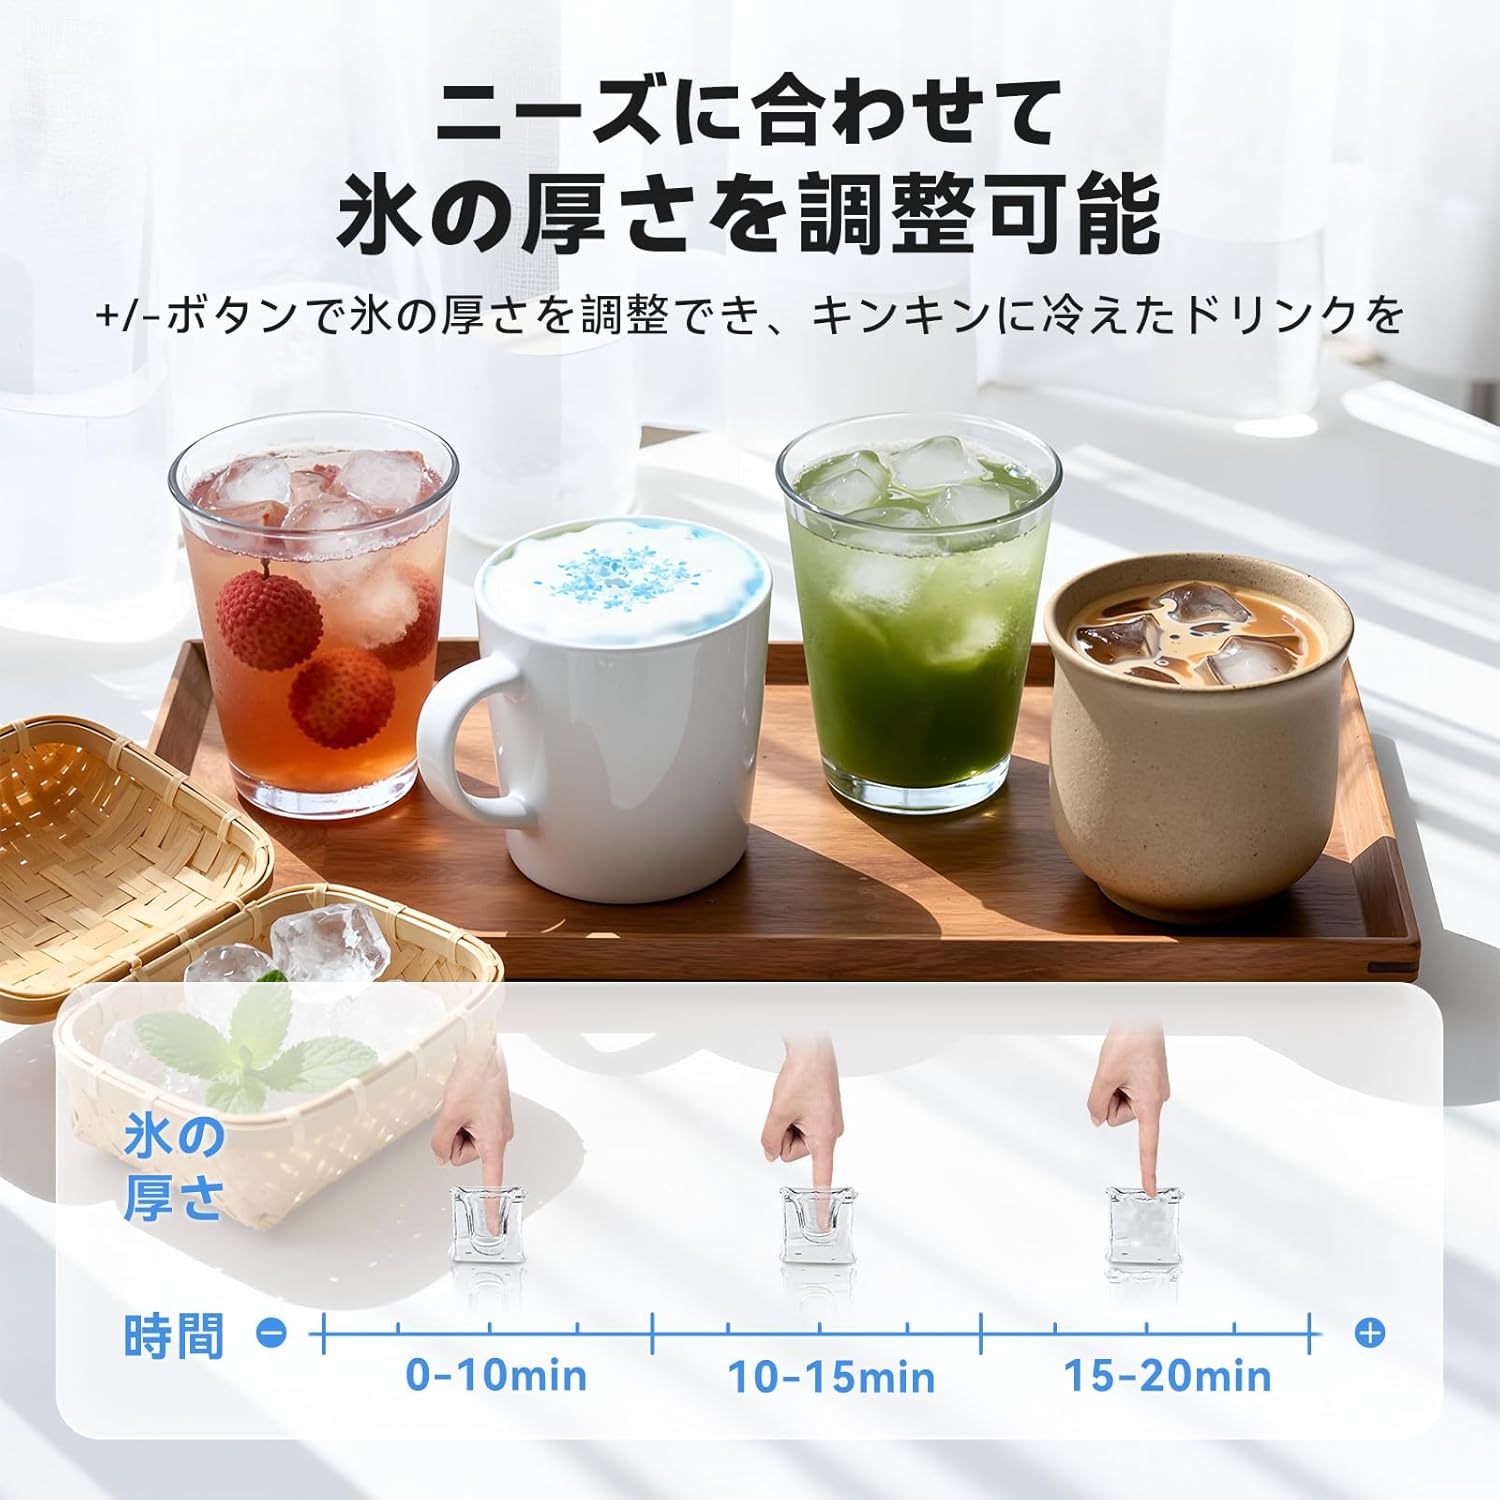
Image: Visual representation of ice thickness adjustment, showing different ice cube sizes corresponding to various production times (0-10 min, 10-15 min, 15-20 min).
Använd +/- buttons on the control panel to select your desired ice thickness. A longer production time results in thicker ice.
4.4 Timerfunktion
The ice maker features a timer function, allowing you to schedule ice production up to 8 hours in advance.

Image: The ice maker with a visual indicating a 24-hour timer function, suggesting convenience for scheduled ice production.
- Tryck på TIMER/RENGÖRING knappen en gång.
- Använd +/- knapparna för att ställa in önskad fördröjningstid (i timmar).
- The unit will start ice production after the set time has elapsed.
5. Underhåll
5.1 Automatisk rengöringsfunktion
The ice maker is equipped with an automatic cleaning function to simplify maintenance.

Image: An animated diagram illustrating the internal water circulation during the automatic cleaning cycle, showing water being thoroughly circulated and drained.
- Se till att vattentanken är fylld med rent vatten.
- Tryck och håll ned TIMER/RENGÖRING knappen i 5 sekunder.
- Rengöringscykeln börjar och varar i cirka 20 minuter.
- After the cycle, drain the water from the unit.
5.2 Tömning av vatten
För att tömma vatten från enheten:
- Koppla ur ismaskinen från eluttaget.
- Lokalisera avtappningspluggen längst ner på enheten.
- Place a container under the drain plug and remove the plug to allow water to flow out.
- När den är tömd, sätt tillbaka pluggen ordentligt.
5.3 Regelbunden rengöring
For optimal performance and hygiene, perform regular cleaning:
- Clean the ice basket and ice scoop with warm, soapy water.
- Torka av enhetens utsida med en mjuk, damp trasa.
- Periodically clean the water tank and ice-making components using a solution of water and vinegar (10:1 ratio) to prevent mineral buildup. Run a cleaning cycle with this solution, then rinse by running two cycles with fresh water.
6. Felsökning
Se tabellen nedan för vanliga problem och deras lösningar.
| Problem | Möjlig orsak | Lösning |
|---|---|---|
| Vatten Shortage Indicator is on | Vattentanken är tom eller så är vattennivån för låg. | Add potable water to the water tank. |
| Ice Full Indicator is on | Iskorgen är full. | Ta bort is från korgen. |
| Ingen isproduktion | Unit not plugged in; water tank empty; ambient temperature too high; refrigerant issue. | Check power connection; add water; ensure proper ventilation; contact customer support if issue persists. |
| Isbitarna är för små eller mjuka | Short ice making cycle; water temperature too high; ambient temperature too high. | Adjust ice thickness setting to a longer cycle; use colder water; ensure unit is in a cool, well-ventilated area. |
| Ovanligt buller | Enheten är inte i våg; fläkten är blockerad; kompressorn fungerar normalt. | Ensure unit is on a level surface; check for obstructions around the fan; some noise from compressor is normal. |
7. Specifikationer
| Särdrag | Specifikation |
|---|---|
| Stämpla | EUHOMY |
| Modellnummer | IM004-CSI |
| Mått (D x B x H) | 25 cm x 37.4 cm x 35 cm |
| Vattentankens kapacitet | 3.2 liter |
| Daglig isproduktion | Upp till 18 kg |
| Isförvaringskapacitet | 1200g |
| Voltage | 100V AC |
| Wattage | 120 wattimmar |
| Kylmedel | R290a |
| Material | Stainless Steel exterior, Plastic interior components |
| Bullernivå | Cirka. 45dB |
8. Garanti och kundsupport
8.1 One-Year Quality Guarantee

Image: A badge indicating a "ONE YEAR GUARANTEE" for the product.
EUHOMY provides a one-year quality guarantee for this product. All products undergo strict quality inspection before shipment to ensure customer satisfaction.
8.2 Kundsupport

Image: Customer support representatives wearing headsets, ready to assist.
Should you encounter any issues or have questions regarding your EUHOMY ice maker, please do not hesitate to contact our customer support team. We are committed to providing prompt and courteous service.
For inquiries after purchase, please follow these steps:
- Go to your Amazon "Order History."
- Select "Problem with order."
- Välj "View profile."
- Click "Ask a question."
Alternatively, you may contact the dedicated customer service channel provided in the Japanese instruction manual included with your product.