1. Introduktion
The Logitech Swytch is a laptop link for video conferencing rooms, enabling a single USB connection to bring your laptop's video conferencing experience to the room's display and peripherals. It provides a universal USB Type-A and Type-C connector with power delivery, ensuring compatibility with most laptops and preventing battery drain during meetings. This manual provides instructions for setting up, operating, maintaining, and troubleshooting your Swytch device.
2. Installationsanvisningar
Follow these steps to connect your Logitech Swytch to your video conferencing room system and laptop.
2.1 Paketets innehåll
Se till att alla komponenter är närvarande:
- Logitech Swytch Hub
- Integrated USB Cable (Type-A and Type-C)
- Power Supply (if applicable, refer to packaging)
2.2 Connecting the Swytch
- Connect to Room System: Connect the Logitech Swytch hub to your room's video conferencing system using the appropriate cables provided with your room system.
- Anslut till bärbar dator: Plug the integrated USB cable from the Swytch into your laptop. The cable features both USB Type-A and Type-C connectors for universal compatibility. Ensure your laptop has a USB 3.0 Type A or C port.
- Kraftleverans: The Swytch provides power delivery to your laptop via the USB connection, helping to keep your laptop charged during use.
- Drivrutinsinstallation: For Windows laptops, MacBooks, and Chromebooks, ensure DisplayLink drivers are installed. These drivers are typically installed automatically upon first connection or can be downloaded from the Logitech support webplats.

Image: The Logitech Swytch connected to a laptop, illustrating the universal USB Type-A and Type-C connector.

Image: The Logitech Swytch with its cable neatly managed, showing the device's compact design.
3. Bruksanvisning
Once connected, the Logitech Swytch allows you to use your laptop's video conferencing application with the room's display, camera, and audio equipment.
3.1 Initiating a Video Conference
- Starta applikation: Open your preferred video conferencing application (e.g., Microsoft Teams, Zoom, Google Meet) on your laptop.
- Select Room Peripherals: Within your application's settings, select the room's camera, microphone, and speakers as your audio/video devices. The Swytch facilitates this connection.
- Starta möte: Begin your meeting as you normally would. Your laptop's display will be mirrored or extended to the room's screen, and the room's peripherals will be active.
3.2 Power Delivery Feature
The Swytch's universal USB Type-A + C connector includes USB Power Delivery. This feature ensures that your laptop receives power through the USB connection, preventing its battery from draining during extended video calls. This is particularly useful for laptops that charge via USB-C.
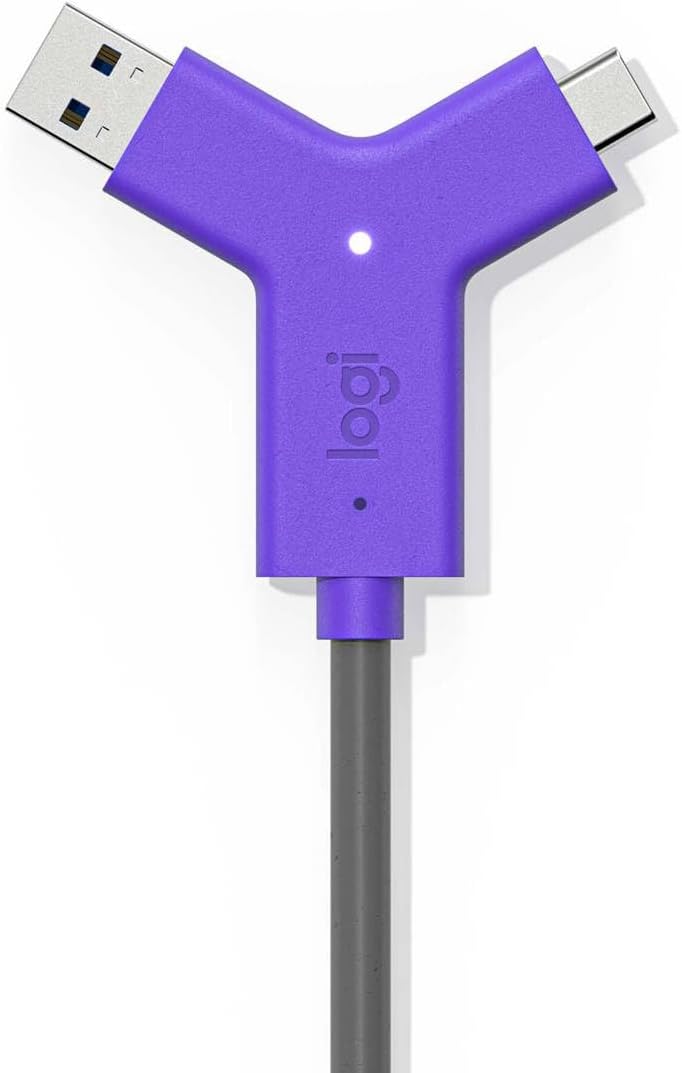
Image: Close-up of the Logitech Swytch's Y-cable, featuring both USB Type-A and Type-C connectors for broad laptop compatibility and power delivery.
4. Underhåll
To ensure the longevity and optimal performance of your Logitech Swytch, follow these simple maintenance guidelines:
- Rengöring: Use a soft, dry cloth to gently wipe the exterior of the Swytch hub and cables. Avoid using abrasive cleaners, solvents, or aerosol sprays, as these can damage the device.
- Lagring: When not in use, store the Swytch in a cool, dry place, away from direct sunlight and extreme temperatures.
- Kabelvård: Avoid bending or crimping the integrated USB cable excessively. Do not pull on the cable to disconnect it; always grasp the connector.
5. Felsökning
If you encounter issues with your Logitech Swytch, refer to the following common troubleshooting steps:
5.1 Ingen video- eller ljudutgång
- Kontrollera anslutningar: Ensure the Swytch is securely connected to both your laptop and the room system.
- Verifiera drivrutiner: Confirm that the DisplayLink drivers are correctly installed on your laptop. Reinstall if necessary.
- Applikationsinställningar: In your video conferencing application, verify that the correct camera, microphone, and speakers (from the room system) are selected.
- Laptop kompatibilitet: Ensure your laptop has a USB 3.0 Type A or C port.
5.2 Laptop laddas inte
- USB-C-anslutning: Ensure your laptop is connected via the USB-C connector if it supports USB Power Delivery charging.
- Strömkälla: Verify that the room system or the Swytch's power supply (if external) is properly connected and receiving power.
5.3 Intermittent anslutning
- Kabelintegritet: Inspect the integrated USB cable for any visible damage.
- Starta om enheter: Try restarting your laptop and the room's video conferencing system.
6. Specifikationer
| Särdrag | Detalj |
|---|---|
| Stämpla | Logitech |
| Modellnummer | 952-000009 |
| Hårdvaruplattform | Logitech |
| Objektets vikt | 5.59 pund (2.54 kg) |
| Produktmått (LxBxH) | 10.5 x 9.8 x 4.6 tum (26.7 x 24.9 x 11.7 cm) |
| Bak Webcam upplösning | 12 MP (Note: This specification may refer to a compatible webcam, not the Swytch hub itself.) |
| Anslutningsmöjligheter | Single-cable link (USB 3.0 Type A or C) |
| Kraftleverans | Yes, via USB Type A + C connector |
| Kompatibilitet | Windows laptops, MacBooks, Chromebooks (requires DisplayLink drivers) |
7. Garantiinformation
Logitech products are typically covered by a limited hardware warranty. For specific warranty terms and conditions applicable to your Logitech Swytch (Model 952-000009), please refer to the official Logitech webwebbplatsen eller garantidokumentationen som medföljde ditt köp. Spara ditt inköpsbevis för garantianspråk.
8. Support
For further assistance, technical support, or to download the latest drivers and software for your Logitech Swytch, please visit the official Logitech support webplats:
You can also find FAQs and community forums on the support site.


